

How To Add Sidebar To Squarespace Blog
Building A Sidebar For Your Squarespace Blog: What To Include & How To Design (Using Any Template)

I'm a big fan of sidebars.
To me, a blog feels more complete and legitimate when I can glance over and see a sidebar of the individual or company who has created the article.
As I read on down the blog post, I might see related posts they've written that I also find useful or I might see a service they offer that I'm interested in.
A sidebar makes the page feel less flat to me - adding a human element and other links of interest.
Squarespace offers certain template that have built in sidebar options for blogs and other pages, but many of the templates (especially the ones I like to use) do not offer a sidebar.
No problem, because there's an easy workaround!
This article will show you how to design a sidebar for your squarespace website, what to include in that sidebar, and how to create a template so you don't have to redesign the sidebar for every single blog post.
Let's get started!
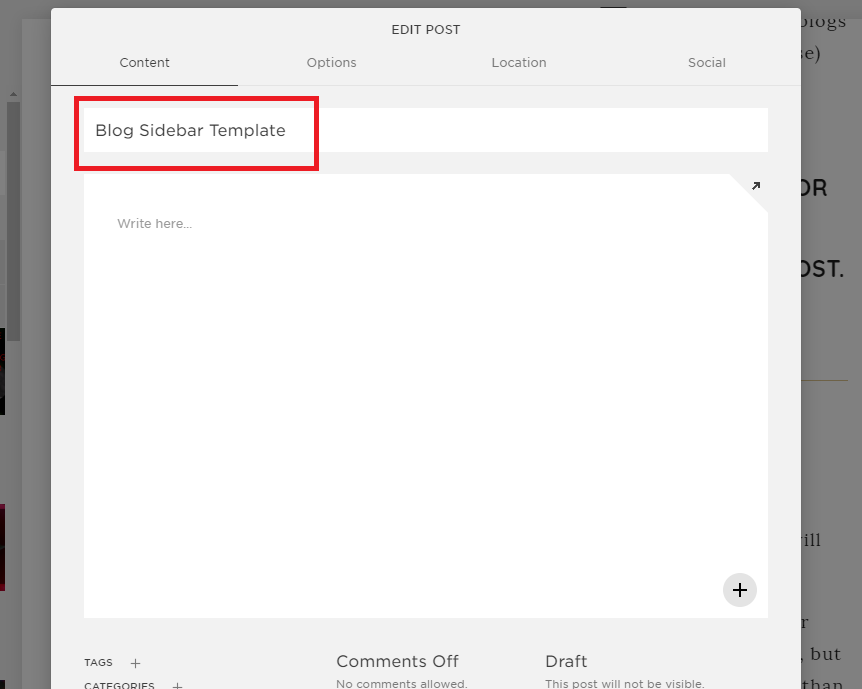
First - Start a new blog post
Add a post using the "+" icon from the dashboard of your Blog page.
In the title field, enter something akin to "Blog Sidebar Template" as this will be the template you work from with each new blog post.
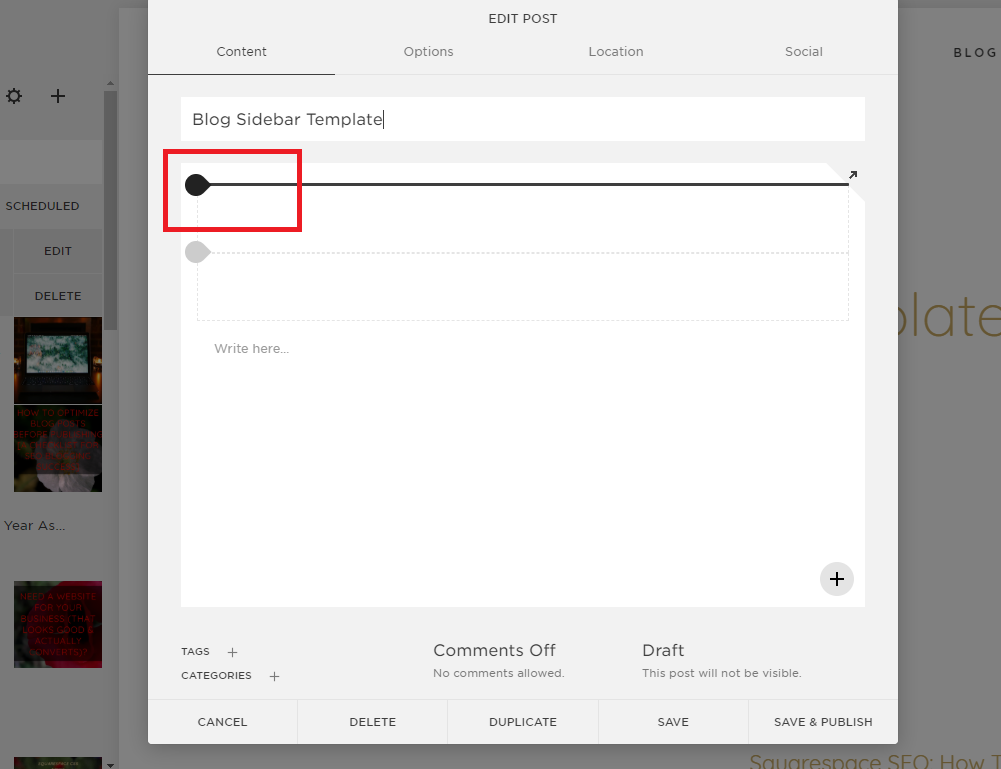
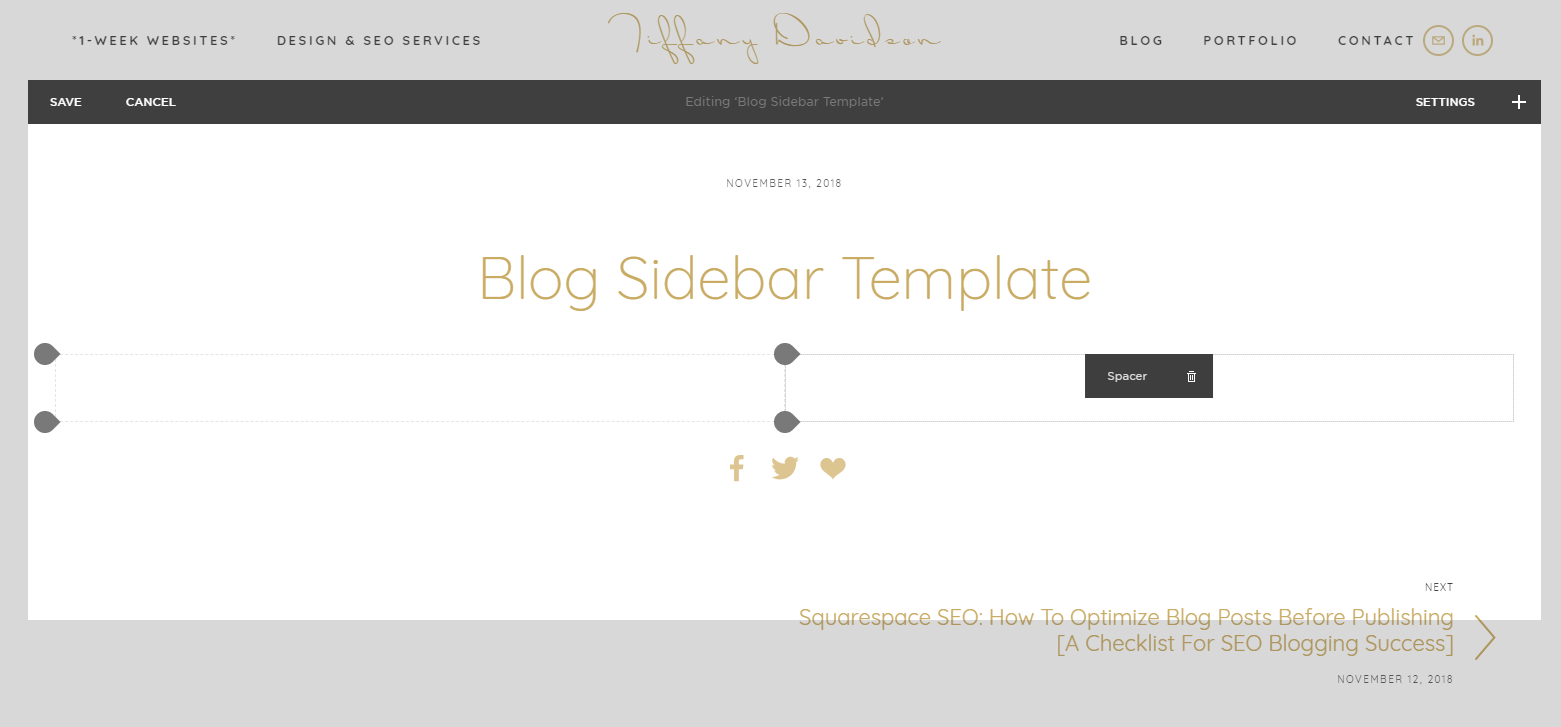
Now - Add two spacer blocks to the top of the post
Quickly throw in two spacer blocks (we're doing this because the next step requires that there be something in the blog post content area and we'll be using the spacer blocks to create a sidebar).
If you don't know how to add a spacer, here are some helpful images.
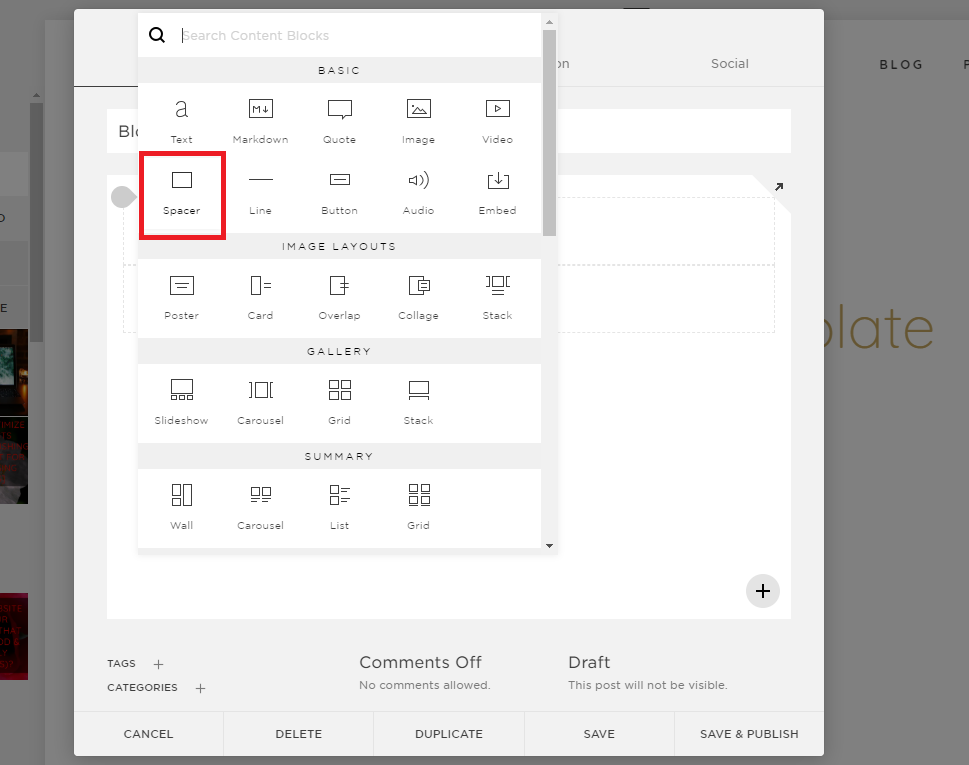
Hover over the top of the content editing box until you see this gray line appear…
Click and a pop-up window will appear. Choose Spacer.
Repeat these two steps so you have two spacers at the top of the post.
Click Save (not save & Publish).
NEXT - Reopen in the larger editing screen
Now we're going to reopen to edit as a full page rather than the tiny pop-up window editing screen. This is a personal preference, but a big one.
I think writing a post as it's going to show is just more practical than designing and writing a post inside of the little pop-up editing window which doesn't show your design styles.
To reopen the post in actual (larger) display:
-
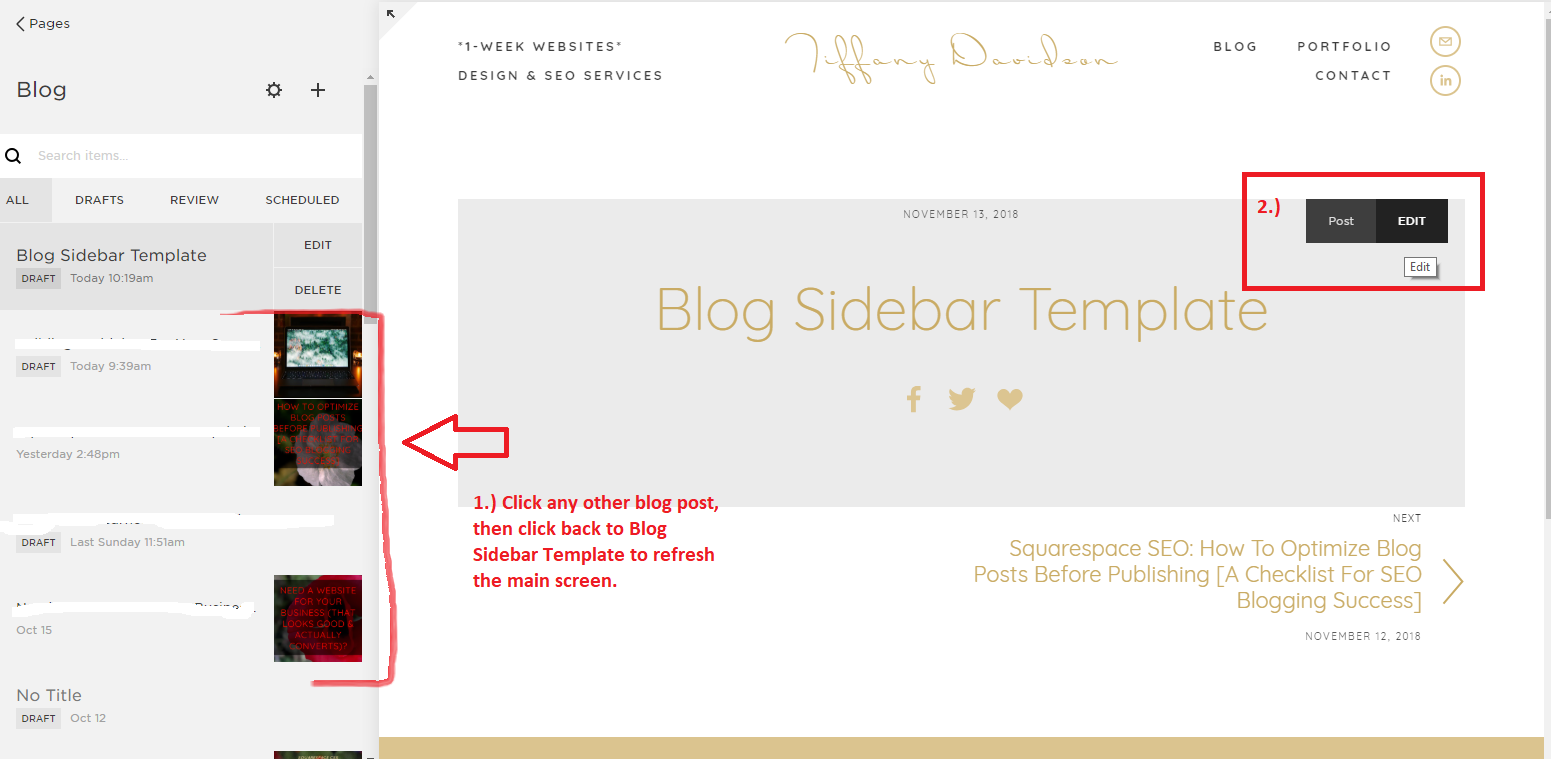
In your dashboard that shows your blog posts, click away from the new post we just created by clicking on a different topic.
-
Then click back to your "Blog Sidebar Template" post and it should show in your main screen to the right as a big empty blog post.
-
Now, hover over the big empty blog post (I sound incredibly professional, huh?) and you'll see a little black box pop up in the top right corner that says Post Edit. Click Edit. Now you should be able to write and design the blog post as it will show on your live site.
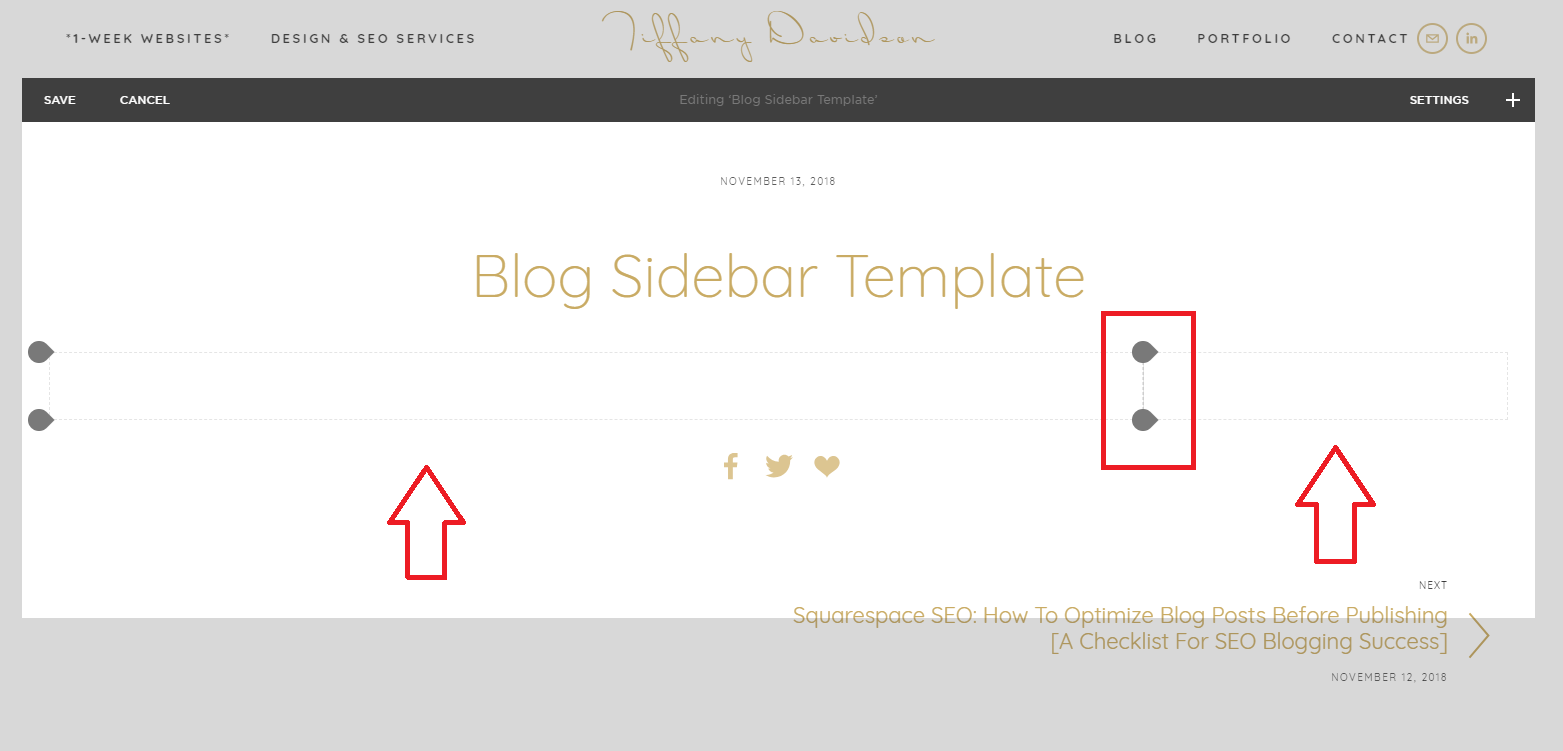
organize YOUR two spacers to form columns
Click and drag one of your spacer blocks to the left or right of the other spacer block, so that they are side by side and not on top of each other.
Click the line between the two spacer blocks and drag to the right so that the right column becomes smaller than the left. Exactly how big you make your sidebar is up to you but I generally make my sidebar 1/4 the size of the overall blog post. So my blog content column is 3/4 of the space and my sidebar column is 1/4 of the space. Like so:
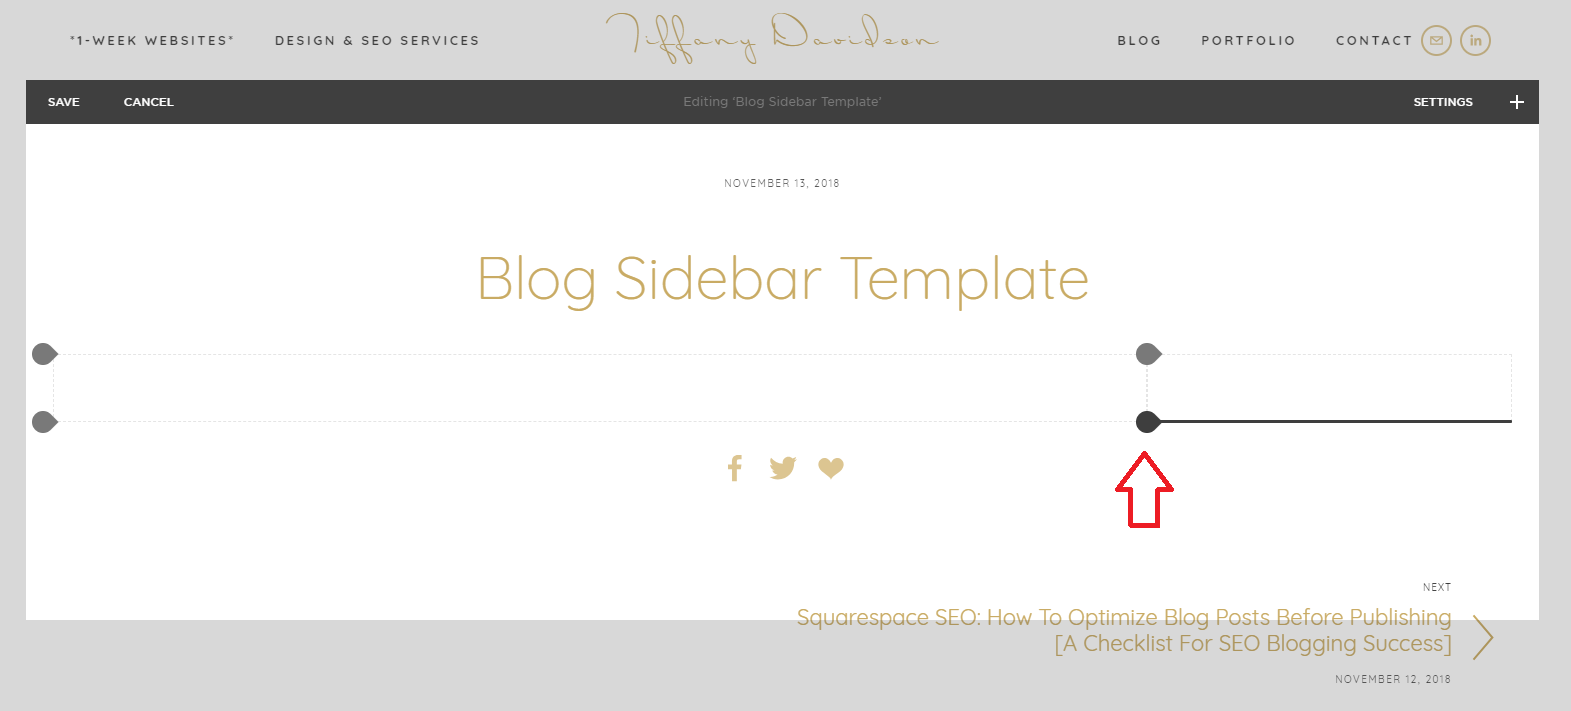
NOW IT'S TIME TO BUILD OUT YOUR SIDEBAR
Start adding blocks underneath the right spacer to serve as your sidebar content.
Do so by hovering over the bottom of the right spacer block, then clicking on the gray tear drop shape that appears.
What To Include On Your Squarespace Blog Sidebar
Here is an example of the content I like to include in my sidebar for all of the websites I manage:
-
A headshot so the reader has an idea of who the author is (use an Image block)
-
A blurb underneath the headshot that explains who you are / what you do / what the website is all about / etc. (use a Text block)
-
An invitation to subscribe to blog posts (use Newsletter block)
-
A list of services offered (use Image block with clickthrough URL or Text block with links to other pages)
-
Any digital products you sell (best to use an Image block showing a graphic of your product with a clickthrough URL)
-
Other related blog posts (I use image blocks with clickthrough URLs)
-
Instagram Feed (use Instagram block, set Display to 2 images per row)
-
A Search function (use Search block)
-
You might want to use Line blocks here and there to aesthetically divide content
Browse other blogs around the Internet for more ideas!
Then, when you're pleased with your sidebar content, click Save (never save & Publish).
HERE ARE THE STEPS TO TAKE WHEN YOU'RE READY TO WRITE NEW BLOG POSTS
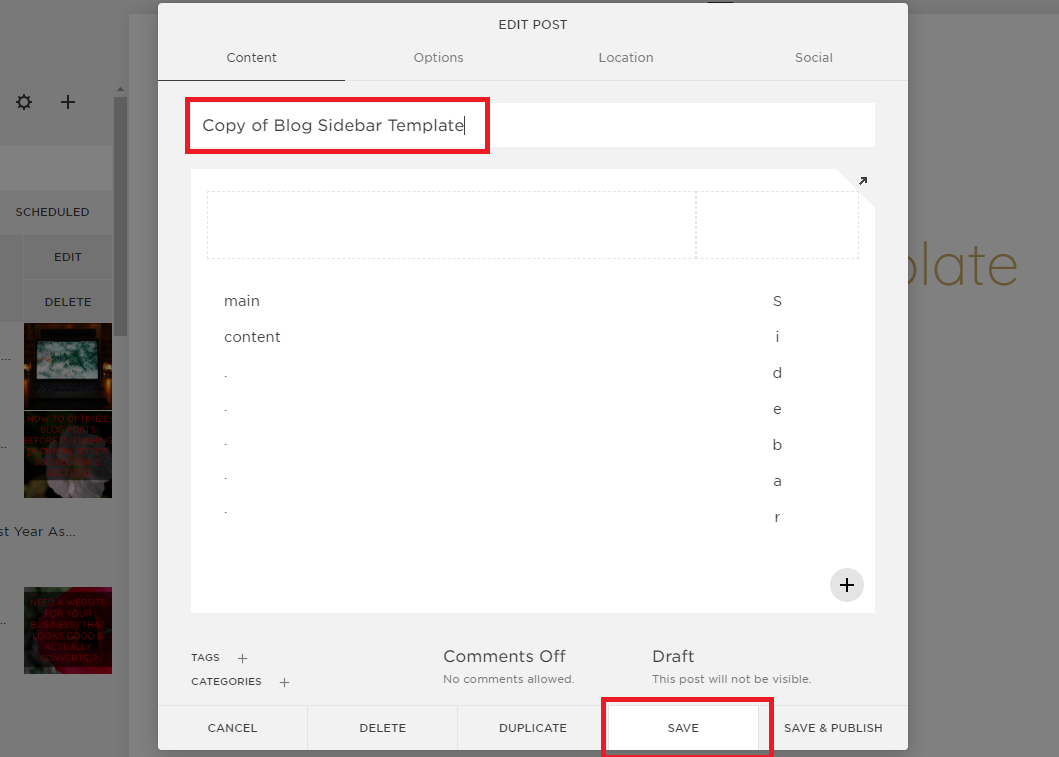
From your blog dashboard, click on the post we've just created "Blog Sidebar Template," select Edit.
In the pop-up editor that appears, click Duplicate at the bottom.
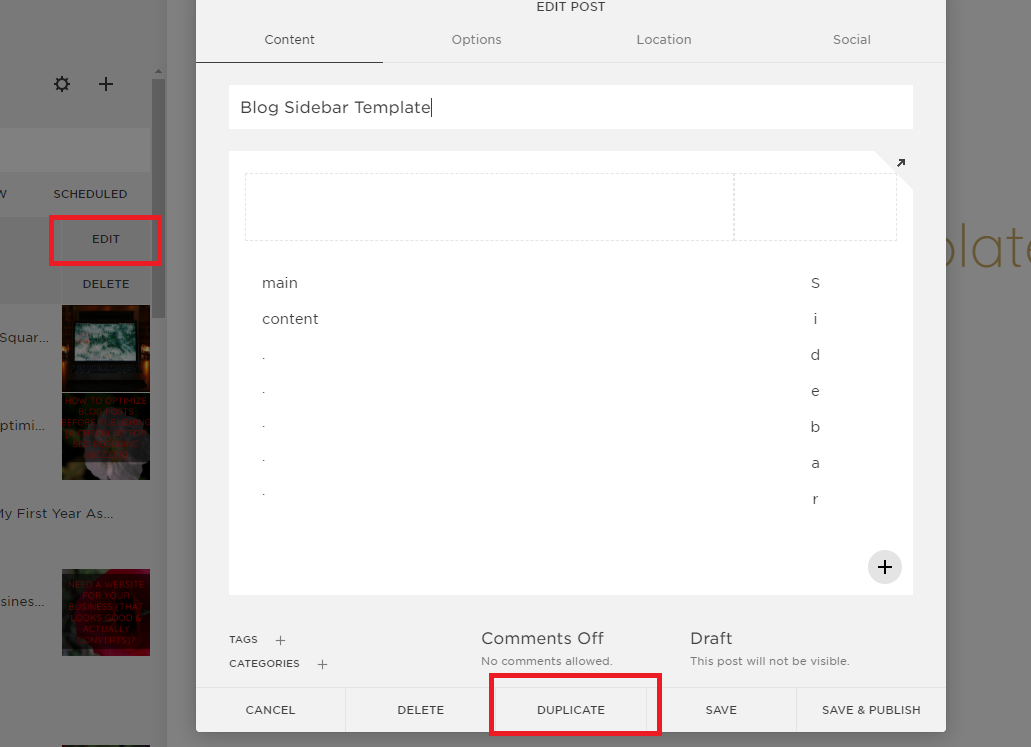
This will generate a new blog post entitled "Copy of Blog Sidebar Template" with the sidebar in place, ready for you to write a new post.
Every single time you want to create a new blog post, use this routine so that your sidebar is already created.
Of course, you'll need to edit the title and URL and all of that before publishing. I recommend reading How To Optimize Blog Posts Before Publishing so that your blog posts rank high in Google.
If anything in this post confused you, please don't hesitate to contact me or leave a comment below. I'm happy to help in any way I can!

I'm Tiffany -
a Squarespace Web Designer & SEO Specialist.
Here on the blog, I write about Squarespace tips, creative inspiration, art & design, and being self-employed.
Let me know if there's any way I can help you!
NEED SQUARESPACE HELP?
Please don't hesitate to reach out to me:
INTERESTED IN A FRESH NEW WEBSITE TO HELP GROW YOUR BRAND?
(You'll get a 20% discount on the first year of your Squarespace subscription when you pay annually by taking advantage of my Circle Membership)


squarespace design
example of a sidebar, blog sidebar examples, what is a sidebar on a website, what to include on blog sidebar, what to put on sidebar, blog sidebar design, sidebar or no sidebar, is sidebar necessary, squarespace sidebar plugin, squarespace sidebar css, squarespace templates with sidebar navigation, squarespace sidebar menu, squarespace blog templates, Tiffany Davidson, squarespace web designer, freelance squarespace web designer, squarespace seo expert
Comment
How To Add Sidebar To Squarespace Blog
Source: https://www.tiffany-davidson.com/blog/squarespace-sidebar-any-template-what-to-include
Posted by: loftonbetwou.blogspot.com
0 Response to "How To Add Sidebar To Squarespace Blog"
Post a Comment